The 5 Easiest Radiators to Install Yourself
This is where the power of DIY comes in. But what if we told you that installing a brand-new radiator could be a straightforward, satisfying, and genuinely budget-friendly weekend project? The secret isn't about becoming a master plumber overnight; it's about choosing the *right* radiator.
This guide is your complete roadmap to a successful DIY radiator installation. We will demystify the process, reveal the top 5 radiators from simple electric panels to stylish Towel Rails Radiators that are genuinely easy for a novice to install, and provide the clear, step-by-step guidance you need to achieve a professional-looking result. Get ready to transform your home's comfort and style, all on your own terms.
What Truly Makes a Radiator DIY-Friendly?
Before we jump into our top 5 list, it’s crucial to understand what separates a simple weekend task from a job that requires a professional. The single most important factor determining the difficulty of a radiator installation is its fuel source. This distinction is the great divide between a simple mounting job and a complex plumbing project.
Fuel Source: The Great Divide
- Electric Radiators: These are the champions of DIY simplicity. An electric radiator is a self-contained unit that doesn't connect to your home's wet central heating system. The installation process is primarily a mounting task: you fix brackets to the wall, hang the radiator, and plug it into a standard socket. There's no draining, no pipes, and no risk of leaks, which eliminates the main source of anxiety for most aspiring DIYers.
- Central Heating Radiators: These radiators are part of a complex, water-filled system connected to your boiler. Installing one involves isolating the specific unit, draining the water from it, disconnecting it from the pipework, and then reversing the process for the new one. The only truly straightforward scenario for a beginner is a "like-for-like" swap, where the new radiator has identical dimensions and pipe connections to the old one. Any deviation from this usually requires altering pipework, a job best left to a professional.
Weight and Material
The material of your radiator affects not only its heating performance but also how easy it is to handle and mount.
- Aluminium: Often called a "superconductor" of heat, aluminium is incredibly efficient, heating up much faster than other materials. Crucially for the DIYer, it's also extremely lightweight, making it easy for one person to lift and position. This makes it an ideal choice for installation on internal stud or plasterboard walls where weight is a concern.
- Mild Steel: This is the most common and budget-friendly radiator material in the UK. While perfectly suitable for DIY, steel radiators are noticeably heavier than their aluminium counterparts, so you might need an extra pair of hands to help with lifting.
- Cast Iron: The heavyweight champion. While beautiful, cast iron radiators are exceptionally heavy and require structurally sound walls and floors. Due to the sheer weight and specialist handling required, these are not recommended for a beginner's DIY project.
Installation Type: A Simple Swap vs. a New Location
Finally, consider whether you are simply replacing an old radiator or installing one in a new spot. As mentioned, a like-for-like replacement that matches the existing pipe centres is the key to a simple central heating installation. Moving a radiator or installing a new one where none existed before involves extending pipework and is a significantly more complex job that falls outside the scope of easy DIY.
The Top 5 Easiest Radiators for the Budget-Conscious DIYer
Now that you know what to look for, here are our top 5 picks for the easiest, most budget-friendly radiators you can install yourself. Each one offers a fantastic combination of style, performance, and DIY accessibility.
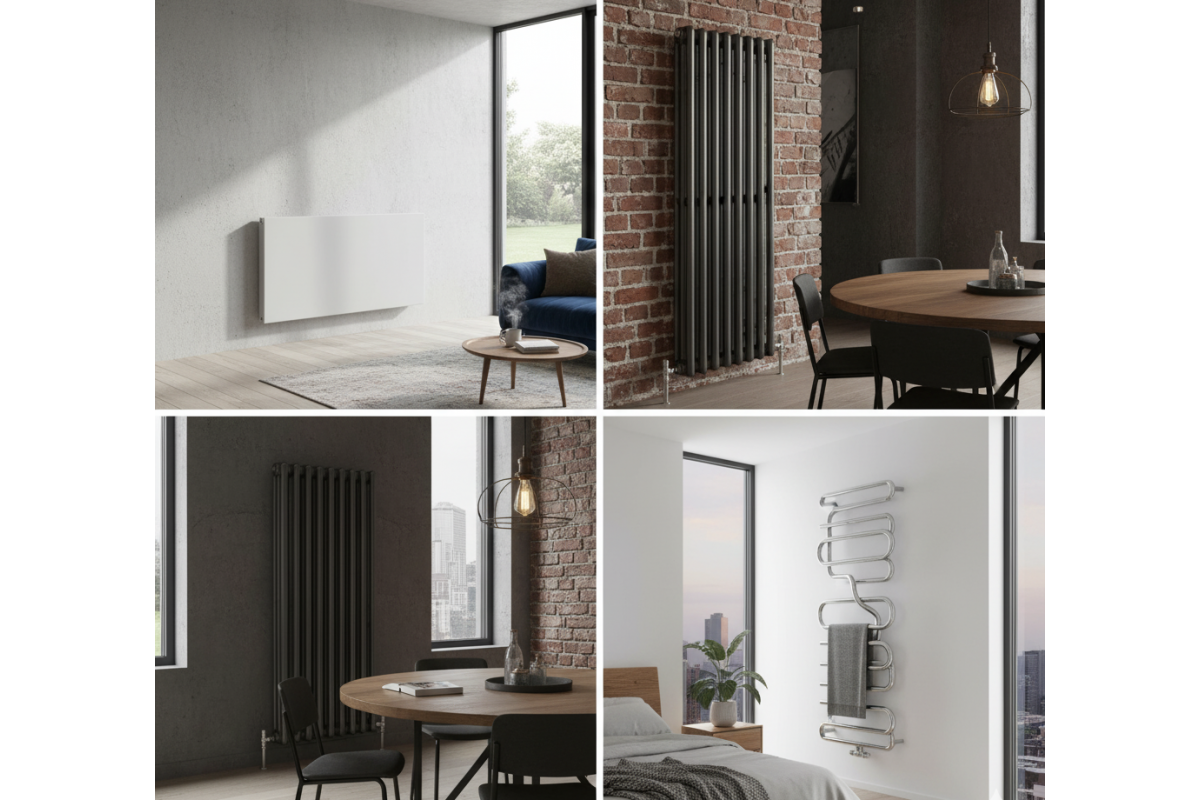
1. The "Plug & Play" Electric Panel Heater
- Why it's DIY-Friendly: This is the absolute pinnacle of installation simplicity. It requires no plumbing and, in its plug-in form, no complex wiring. The process is as straightforward as hanging a heavy picture frame on the wall.
- Best For: Home offices, bedrooms, conservatories, or any room that needs a quick, independent, and easily controllable heat boost without interfering with your central heating.
- Pro DIY Tip: Use the large cardboard box the radiator comes in as a floor template. You can lay it against the wall and mark your drill holes through it, protecting both your floor and the radiator from scuffs during setup.
- Internal Link: Explore our range of efficient electric radiators.
2. The Electric Towel Rail
- Why it's DIY-Friendly: An electric towel rail brings that touch of bathroom luxury without the plumbing nightmare. It operates as a standalone appliance, meaning you can enjoy warm, dry towels in the middle of summer when your main central heating is switched off. This makes it a perfect, easy-to-install upgrade for any bathroom.
- Best For: Bathrooms, en-suites, cloakrooms, and utility rooms.
- Pro DIY Tip: When drilling into bathroom tiles, place a strip of masking tape over your marked spot before you start. This simple trick prevents the drill bit from slipping on the slick tile surface and significantly reduces the risk of cracking the tile.
- Internal Link: Discover our stylish and affordable electric-only towel rails.
3. The Lightweight Aluminium Radiator (For a Simple Swap)
- Why it's DIY-Friendly: If you're tackling a central heating swap, the light weight of an aluminium radiator makes it far easier for one person to handle, lift, and hang compared to a traditional steel model. It also provides a fantastic efficiency upgrade, heating up much faster and using less water.
- Best For: A direct, same-sized replacement of an old radiator in any room, but especially useful on plasterboard walls where minimising weight is advantageous.
- Pro DIY Tip: Because aluminium radiators hold less water and transfer heat so quickly, they respond almost instantly to your thermostat. You'll feel the room warm up faster and may find you can turn your thermostat down a degree, leading to savings on your heating bills.
- Internal Link: Upgrade to our high-efficiency aluminium radiators.
4. The Standard Compact Panel Radiator (The Like-for-Like Hero)
- Why it's DIY-Friendly: As the most common type of radiator in UK homes, swapping an old one for a new model of the exact same size is the most straightforward plumbing task a novice can undertake. The familiarity and standardisation of these radiators make the process predictable and manageable.
- Best For: A cost-effective, direct replacement for an existing panel radiator that is rusted, performing poorly, or simply looks dated.
- Pro DIY Tip: Before you touch the old radiator, take a clear photo of the lockshield valve (the one usually covered by a plastic cap). When you close it, use an adjustable spanner and count the exact number of rotations it takes. You must open the new valve by the same amount to ensure your home's heating system remains balanced.
- Internal Link: Browse our huge selection of convector radiators.
5. The Versatile Dual Fuel Towel Rail
- Why it's DIY-Friendly: This option truly offers the best of both worlds. It connects to your central heating for efficient winter warmth but also contains an electric heating element for independent, year-round use. The electrical part is a simple installation, giving you an instantly functional electric towel rail even if you decide to tackle the plumbing connection later.
- Best For: Main bathrooms where you want the luxury of warm towels all year round without having to fire up the entire central heating system.
- Pro DIY Tip: Break the job into two smaller, more manageable projects. Install the electric element and use it as a standalone electric rail first. This gives you immediate benefit. You can then choose to connect it to the central heating system at a later date when you feel more confident.
- Internal Link: Get year-round comfort with our dual fuel towel rails.
Your Essential Toolkit: What You'll Actually Need
Having the right tools is half the battle. Here is what you'll need for a safe and simple installation.
- Power Drill & Drill Bits: Essential for both electric and central heating installations. Always match the drill bit to your wall type.
- Spirit Level: Non-negotiable for both types. A crooked radiator is noticeable and can affect performance.
- Tape Measure & Pencil: The fundamentals of all DIY. Remember: measure twice, drill once.
- Adjustable Spanners (x2): Essential for central heating swaps. Use one to hold the valve body steady and the other to turn the connecting nut to prevent damaging pipework.
- Radiator Bleed Key: An essential, inexpensive tool for central heating swaps used to release trapped air.
- PTFE Tape (Plumber's Tape): Your best friend for creating a watertight seal on threaded joints for central heating swaps.
- Bucket & Old Towels: Essential for central heating swaps. Be prepared for water, as even a drained radiator holds residual dirty water.
- Pipe/Cable Detector: A crucial safety device for both installation types. Never drill into a wall without first checking for hidden pipes or live cables.
The Ultimate Step-by-Step Installation Guides
Feeling confident? Here are two clear, concise guides to walk you through the installation process.
Guide A: How to Install a Plug-In Electric Radiator in Under 30 Minutes
- Safety First: Ensure the wall socket is switched off. If hardwiring, turn off power at the consumer unit (fuse box).
- Find the Perfect Spot: Choose your location, ensuring at least 10-15 cm of clearance above and below the radiator for optimal heat circulation.
- Mark Your Brackets: Use your tape measure and spirit level to mark the positions for the wall brackets. Double-check they are perfectly level.
- Check the Wall: Run your pipe and cable detector over the marked areas to ensure it is safe to drill.
- Drill & Mount: Drill the holes for your fixings. If using wall plugs, tap them in until flush. Securely screw the mounting brackets into place.
- Hang & Secure: Carefully lift the radiator and hang it onto the brackets, ensuring it locks securely.
- Power Up: Plug the radiator into the wall socket and switch it on. You're done!
Guide B: How to Perform a Perfect Like-for-Like Central Heating Radiator Swap
- Preparation is Key: Turn off your entire central heating system and wait for all radiators to cool down completely.
- Isolate the Radiator: Turn the Thermostatic Radiator Valve (TRV) to 'off'. Then, use a spanner to turn the lockshield valve fully clockwise, counting and writing down the exact number of turns.
- Drain the Old Radiator: Place a bucket under the TRV and slowly loosen the large nut connecting the valve to the radiator. Open the bleed valve at the top to speed up the draining process.
- Remove the Old Radiator: Once drained, fully disconnect both valves and carefully lift the radiator off its wall brackets. Tilt it to drain any remaining water into your bucket.
- Prepare the New Radiator ("Dressing"): Wrap the new radiator valve tails with PTFE tape (clockwise, 15-20 times) and screw them into the new radiator. Fit the blanking plug and bleed valve.
- Mount the New Radiator: Check if the new radiator fits the existing brackets. If not, install the new brackets, ensuring they are level. Hang the new radiator.
- Reconnect & Refill: Reconnect the pipework. Open the lockshield valve by the exact same number of turns you counted earlier. Then, slowly open the TRV to fill the radiator.
- Bleed the Radiator: As it fills, use your radiator key to open the bleed valve and release trapped air. Close it as soon as water starts to spit out.
- Check for Leaks & Repressurise: Thoroughly inspect all joints for drips. If you have a pressurised system, top it up using the filling loop, typically to around 1.5 bar.
Avoid the Headaches: 7 Common DIY Installation Mistakes
A successful project is as much about avoiding errors as it is about following steps. Here are the most common pitfalls.
- Using the Wrong Wall Fixings: A radiator full of water is heavy. Always use heavy-duty fixings appropriate for your wall type (masonry plugs for brick, specialist fixings for plasterboard).
- Over-tightening Connections: This can strip threads or crack the valve body, causing leaks. Tighten until firm and snug, but don't use excessive force.
- Forgetting PTFE Tape: This is essential for creating a watertight seal on the threaded valve tails. Always wrap it clockwise.
- Not Bleeding the Radiator Properly: Trapped air causes cold spots and gurgling noises, severely impacting performance.
- Guessing the Lockshield Valve Setting: Failing to count the turns will unbalance your entire home's heating system, causing other radiators to heat up poorly.
- Incorrect Electrical Wiring: Hardwiring an electric rail, especially in a bathroom, is not a beginner's job and must be done by a qualified electrician under UK building regulations.
- Choosing the Wrong Size (BTU): If the radiator's heat output (BTU) is too low for the room, it will never feel warm enough. Use a BTU calculator to find the right size.
A Quick Word on the Rules: Staying Safe and Legal in the UK
Home improvement in the UK is governed by Building Regulations to ensure safety. The rules for these simple DIY projects are clear and easy to follow.
Plumbing (Central Heating)
A straightforward, like-for-like radiator replacement is generally considered routine maintenance and does not require you to notify Building Control. To ensure quality, look for products that are WRAS Approved, which certifies they meet high UK standards. You can find out more at the official WRAS approvals website.
Electrics (Electric & Dual Fuel)
Electrical safety is governed by Part P of the Building Regulations. Installing a radiator that simply plugs into an existing socket is perfectly acceptable to do yourself. However, any work involving a new circuit or hardwiring in a bathroom is "notifiable work" and must be carried out by a registered, competent electrician.
Your Successful DIY Project Starts Here
You are now equipped with the expert knowledge to undertake a radiator installation with confidence. We've shown that a DIY radiator upgrade is an incredibly achievable, rewarding, and budget-friendly project. The key to success is simple: choose the right type of radiator for a DIY installation and follow the correct steps with care and attention.
Ready to find the perfect radiator for your project?
- First, use our free heating calculator to find the exact heat output your room needs.
- Then, explore our top-rated, budget-friendly ranges of electric-only towel rails and eco aluminium radiators.
- Have a question, a tip, or a success story to share? Drop a comment below – our team of experts is here to help and we'd love to hear from you!