How to Fix a Leaking Radiator Complete Guide
There are few household maintenance issues that trigger panic quite like the discovery of a leaking radiator. It often starts innocuously enough perhaps a slight discoloration on the carpet, a warped laminate board, or a persistent damp smell in the living room. However, what begins as a slow drip can quickly escalate into a significant problem that threatens the structural integrity of your flooring and the efficiency of your entire central heating system.
For many homeowners, the immediate instinct is to call a plumber. While professional help is invaluable for complex boiler issues, a leaking radiator is often a surprisingly manageable DIY task. The heating system in your home is essentially a pressurized loop of water. Leaks occur when the integrity of that loop is breached, usually at the "weak points" where components join together namely, the valves, the nuts, and the compression joints.
This comprehensive guide is designed to take you from a position of worry to a position of control. We will not just tell you to "tighten the nut"; we will explain the physics of why the leak is happening, how to perform forensic-level diagnosis to find the exact source, and the specific mechanical steps required to seal it permanently. Whether you are dealing with a modern designer vertical radiator or a 30-year-old steel panel, the principles of hydraulic repair remain the same.
Table of Contents
- 1. How to find the source of your radiator leak
- 2. What can cause a radiator to leak?
- 3. Is your radiator leaking from the spindle?
- 4. Do you need to replace a radiator valve?
- 5. Different types of leaks on your radiator
- 6. Is the radiator valve or gland the cause of the leak?
- 7. Is your radiator leaking because of corrosion?
- 8. How to repair a leaking radiator gland
- 9. Radiator Leaking at the Connection or Radiator Tail
- 10. Before we start to fix a leaking radiator…
- 11. Conclusion
How to find the source of your radiator leak
The most common mistake DIY enthusiasts make is attempting to fix a leak before they have accurately identified where it is coming from. Water is a deceptive element. Due to gravity and surface tension, water can travel a significant distance along the underside of a pipe or the back of a radiator panel before it finally forms a droplet and hits the floor.
If you see a wet patch on the floor, do not assume the leak is directly above it. You need to perform a systematic inspection.
The Dry-Down Method
You cannot find a leak on a wet radiator. Your first step must be to completely dry the area. Use an old bath towel to absorb the bulk of the water, followed by kitchen paper to ensure the valves, pipes, and floor are bone dry.
The Pressurization Technique
Leaks are often intermittent. They may only appear when the metal expands or contracts. To force the leak to reveal itself, turn your central heating on and wait for the radiators to reach maximum temperature. The increase in pressure (usually rising to around 1.5 to 2.0 bar in the system) and the thermal expansion of the metal will often force water out of minute cracks or loose joints that appear sealed when cold.
The Tissue Paper Test
This is the industry-standard trick for micro-leaks. Take a single square of toilet paper or kitchen towel (toilet paper is better as it is more absorbent and changes texture instantly when wet). gently dab it against the following key "risk zones":
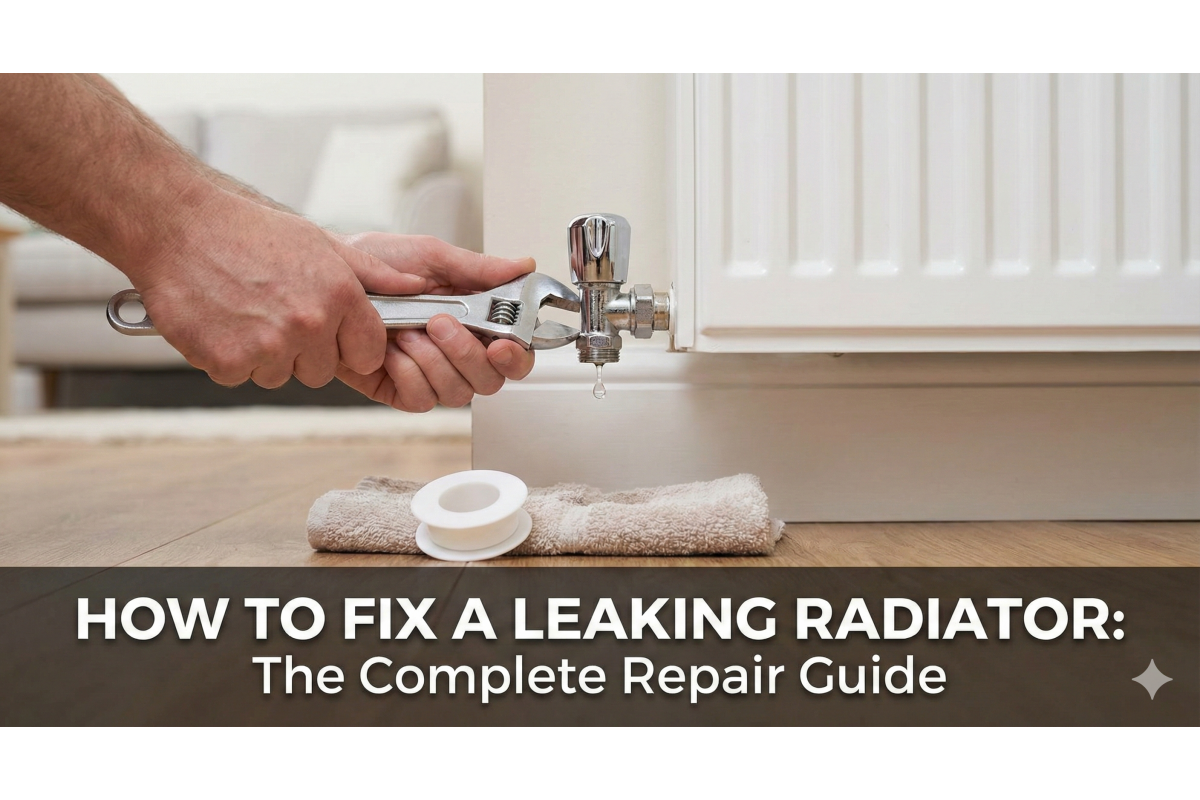
- Zone 1: Under the Valve Cap. Remove the plastic head of the valve and press the paper against the metal spindle.
- Zone 2: The Union Nut. Wrap the paper around the large nut that connects the valve to the radiator.
- Zone 3: The Olive Joint. Press the paper against the junction where the copper pipe enters the valve from the floor.
If the paper darkens or becomes damp, you have found your culprit. Mark this area with a piece of tape or a mental note.
What can cause a radiator to leak?
Understanding the root cause of a leak is vital for preventing future occurrences. Radiators are static objects they don't move so why do they suddenly start dripping?
1. Thermal Expansion and Contraction cycles
This is the leading cause of weeping joints. Every time your boiler fires up, the water inside the radiator heats up to 60°C or 70°C. This causes the copper pipes and the brass valves to expand. When the heating turns off, they cool down and contract. Over years of daily heating cycles, this microscopic movement can cause the compression nuts to slowly work themselves loose, breaking the watertight seal.
2. Perished Washers and Packing
Inside every radiator valve, there are rubber O-rings or "packing" material (often made of hemp in older systems or PTFE/rubber in modern ones). These materials are not immortal. Over time, exposure to hot water, chemical inhibitors, and sludge causes the rubber to become brittle and crack. Once the rubber loses its elasticity, water can seep past it.
3. Internal Corrosion (The "Pinholing" Effect)
If the water in your central heating system is not chemically balanced, a reaction occurs between the steel of the radiator, the water, and oxygen. This creates iron oxide (rust). This rust eats away at the metal from the inside out. Eventually, the metal becomes so thin that a tiny hole appears—a "pinhole." This is often a sign of a wider system health issue.
4. Physical Trauma
Radiator valves usually protrude into the room at ankle height. They are frequently knocked by vacuum cleaners, children playing, or furniture being moved. A sharp knock can disrupt the "olive" (the brass ring that seals the pipe) inside the joint, causing an immediate leak.
Is your radiator leaking from the spindle?
The spindle is the small, upright metal shaft that connects the plastic handle you turn to the internal mechanism that stops the water flow. It is the only moving part of the valve assembly, which makes it highly prone to wear and tear.
To confirm a spindle leak, you must remove the cosmetic plastic cap. On a manual valve (Lockshield), this might just pull off, or there may be a small central screw under a colored cap. On a Thermostatic Radiator Valve (TRV), you usually unscrew a silver knurled ring at the base of the plastic head to lift the entire sensing head off.
Once exposed, look closely at the metal pin sticking up. If water is welling up around the base of this pin, or if there are signs of limescale (crusty white or green deposits) on the shaft, you have a classic Gland Leak. This means the water is escaping up the shaft because the internal seal has failed. Fortunately, this is one of the easiest leaks to repair and often does not require draining the radiator.
Do you need to replace a radiator valve?
While many leaks are repairable, there comes a point where a valve is "beyond economic repair." Trying to patch up a valve that is structurally compromised is a waste of time and risks a catastrophic flood later on.
You should opt for a full replacement (buying a new valve and draining the system) if:
- The Valve is Seized Solid: If you cannot turn the spindle even with pliers and penetrating oil, the internal mechanism has calcified. Forcing it will snap the spindle, causing a major leak.
- Visible Cracks in the Brass: If you can see a hairline crack in the metal body of the valve (often caused by frost damage if the heating was off during winter, or over-tightening), no amount of tape will seal it. The body must be replaced.
- Cross-Threaded Nuts: If a previous DIY attempt has stripped the threads on the valve, you will never get a tight seal.
- Excessive Corrosion: If the valve is green, crumbling, or heavily rusted, it is safer to replace it than risk it disintegrating when you try to apply a wrench to it.
Different types of leaks on your radiator
For the purpose of repair, we categorize radiator leaks into three distinct zones. The fix for each zone is completely different, so correct identification is key.
Zone A: The Valve Gland Leak
This occurs at the top of the valve, under the plastic handle. It is caused by the failure of the "packing" material that seals the moving spindle. This is the most common leak but also the easiest to fix (often taking less than 5 minutes).
Zone B: The Union Joint Leak
This leak appears at the large hexagonal nut that connects the valve body to the radiator itself (the "tail"). This is a metal-on-metal seal, sometimes aided by PTFE tape. Leaks here are usually caused by movement someone kicking the radiator or the pipes expanding.
Zone C: The Compression Pipe Leak
This leak is found at the bottom of the valve, where the copper pipe comes up from the floor. This joint relies on a soft brass ring called an "olive" being crushed between the nut and the pipe. If the nut is loose, or if the olive is damaged, water will spray or weep from this joint.
Is the radiator valve or gland the cause of the leak?
It is a common point of confusion: what is the difference between the "valve" and the "gland"?
Think of the Valve as the entire metal unit the brass body, the connections, and the handle. The Gland is a specific sub-component inside the valve. It is the seal that wraps around the turning spindle.
If the leak is dripping from the very top of the metal assembly, running down the spindle, it is a Gland issue. If the leak is spurting from the threads where the nut meets the radiator, it is a Valve Connection issue.
Why does this distinction matter? Because a gland leak can often be fixed without turning off the water supply or draining the system (if you are quick), whereas a valve connection leak usually requires you to drain the radiator to relieve the pressure before you can open the joint.
Is your radiator leaking because of corrosion?
This is the scenario every homeowner dreads. If you have thoroughly checked the valves, the nuts, and the pipes, and found them all to be bone dry, but there is a puddle on the floor, you must check the radiator panel itself.
Run your hand carefully along the bottom edge of the radiator metalwork. If you feel uneven, bubbly paint, or wet rust flakes, your radiator is rusting from the inside out. You may spot a tiny brown dot where a droplet of water is forming.
How to repair a leaking radiator gland
If you have identified the leak as coming from the spindle (Zone A), follow this detailed procedure. This is known as "repacking the gland."
Step 1: Preparation
Turn the valve to the "OFF" position (clockwise). Place an old towel underneath the valve to catch any drips. You do not strictly need to drain the system for this, but working quickly is advised.
Step 2: Access the Gland Nut
Remove the plastic cap. Look at the base of the spindle. You will see a small hexagonal nut (usually 10mm or 11mm). This is the Gland Nut.
Step 3: The "Nip" Test
Before you take anything apart, try the easiest fix. Use a small adjustable spanner or a pair of grips to tighten this gland nut. Turn it clockwise. You only need to turn it a tiny amount—perhaps 1/8th of a turn. This compresses the existing rubber seal tighter against the spindle. Dry the area and wait 5 minutes. If the leak stops, you are finished!
Step 4: The PTFE Fix (If tightening fails)
If tightening didn't work, you need to add new packing material.
- Turn the gland nut anti-clockwise to unscrew it. Lift it up the spindle. (Don't panic if a little water bubbles up—the main valve seal is below this point).
- Take a 15cm length of PTFE Tape (Plumber's Tape). Twist it into a thin string.
- Wrap this PTFE string tightly around the spindle, pushing it down into the gap where the nut came from. You are essentially creating a new washer.
- Use a small flat-head screwdriver to push the tape down firmly into the valve body.
- Screw the gland nut back down over the top of the tape. As you tighten it, it will crush the PTFE tape, expanding it to fill the gap and create a watertight seal.
Radiator Leaking at the Connection or Radiator Tail
If the leak is at the large union nut connecting the valve to the radiator (Zone B), the fix requires more force and usually involves draining the radiator.
The Tightening Method
Often, these joints just work loose. You need two tools for this: one spanner to turn the nut, and a second spanner (or wrench) to hold the valve body still. This is critical. If you turn the nut without holding the valve, you will twist the copper pipe coming from the floor and cause a massive leak under the floorboards.
Hold the valve steady and tighten the union nut clockwise. Give it a "quarter turn." Dry and check.
The "Remake" Method
If tightening doesn't work, the seal is broken. You must remake the joint.
- Drain the Radiator: Close both the Lockshield and TRV valves. Open the bleed valve to release pressure. Open the drain-off valve or slacken the nut over a bowl to catch the water.
- Open the Joint: Once drained, undo the union nut fully. Pull the valve back from the radiator tail.
- Clean and Tape: Clean the threads of the radiator tail (the part sticking out of the radiator). Wrap PTFE tape around these threads about 10 to 15 wraps in a clockwise direction is standard.
- Reconnect: Push the valve back onto the tail and hand-tighten the nut.
- Final Torque: Use your spanners to tighten the nut firmly. The PTFE tape will fill the microscopic gaps in the threads and prevent water from escaping.
- Refill: Open the valves, bleed the air out, and check for leaks.
Before we start to fix a leaking radiator…
Preparation is the difference between a successful 10-minute repair and a flooded living room. Before you attempt any of the fixes above, run through this checklist.
1. Protect Your Property
Radiator water is not clean tap water. It is "dead water" usually black, oily, and smelling of metal and sulfur due to the magnetite sludge. It stains carpets permanently. Before you start, lay down a plastic sheet or bin bag, and cover it with old absorbent towels.
2. Gather the Right Tools
Do not start the job until you have:
- Two Adjustable Spanners: One for turning, one for holding.
- PTFE Tape: Essential for creating seals.
- Old Tupperware Container: Ideally one with a low rim (like a margarine tub) that fits under low pipes.
- Radiator Bleed Key: Necessary for draining and refilling.
- Bucket: For emptying the smaller catch containers.
3. Understand Your System Pressure
If you have a Combi boiler or a System boiler (sealed system), fixing a leak will cause the pressure to drop. Before you start, locate the "Filling Loop" on your boiler and ensure you know how to use it to repressurize the system back to 1.5 bar once the repair is complete. If you have a gravity-fed system (with a tank in the loft), ensure you have a bung to stop the header tank if you need to drain the whole house.
Conclusion
Fixing a leaking radiator is a rite of passage for any homeowner. While the sight of water escaping your heating system is alarming, the mechanisms involved are simple. Most leaks are caused by loose nuts, perished rubber, or a lack of thread sealant—all of which are easily rectified with basic tools and a roll of PTFE tape.
By following the diagnostic steps in this guide, you can identify whether the issue lies with the spindle gland, the union nut, or the radiator body itself. Remember, the golden rule of plumbing is "patience." Take the time to dry the area, find the exact source, and isolate the water supply before you start wrenching nuts.
Finally, treat a leak as a warning sign. If your radiator leaked due to corrosion, it is a clear signal that your system needs cleaning and dosing with a chemical inhibitor. A watertight repair today, combined with proper system maintenance, will ensure your home stays warm and dry for years to come.